

As I mentioned in Monday's Make : Grow : Thrift, I was making cushion slips to match the quilt I'd made. As the four squares weren't quite big enough for the cushion insert, I needed to add a border and therefore a mitred corner.
I don't believe in making things hard. I always look to make things as easy as I can.
Here's how to add an easy mitred corner.
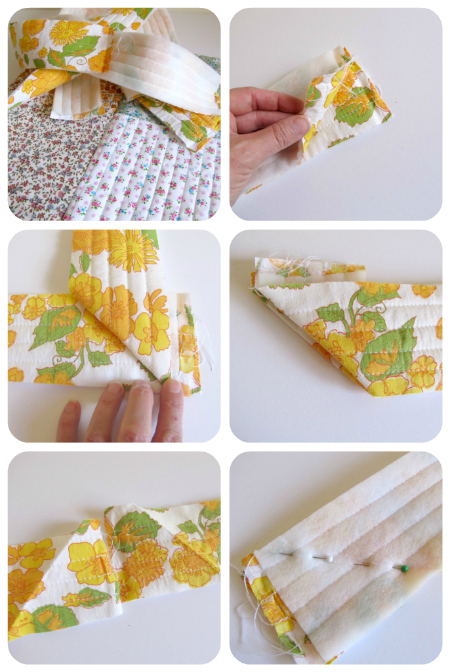
- Prepare your strips ensuring that there is an additional tail at each end. The length of the tail will depend on the width of your strip. The wider the strip the longer the tail needed - it needs to be longer than the mitred corner.
- Place the two strips on top of each other. Right sides of fabric together.
- Fold the top layer back to a 45 degree angle
- Turn over and fold the second piece back to match
- Press well so the crease lines are prominent
- Place back together and pin along folded line ready for sewing

- Sew along folded line
- Trim your corner.
- Then you can add your next piece.
- Place loose strip under the joined piece - right sides together and then repeat the process
- After the 3rd piece is joined, it's a good idea to start sewing the border to your main piece (in my case it's the 4 quilted squares) this allows you to make any adjustments before all the mitred edges are done.
- Continue your way around until all four strips are sewn. The last corner is just a matter of butting the two ends up to one another at the 45 degree angle until they meet.

1 comment:
Thank you for this great little tutorial! It's always so helpful to have some guidance for these things when I'm trying to nut them out at home ...
Post a Comment